About

Pages - Menu

29.1.10

Strawberry Jam Coconut Slice

Jam coconut slices are one of my favourite treats. I remember buying my first one at a local bakery and it tasted not overly too sweet and not too dry. It was perfect. I have been through a few jam coconut slice recipes and most of them are too sweet for my taste buds. I just cut down the sugar the second time making them. Most of the time the jam is already sweet so you don't need that much sugar in the first place.

I found a coconut slice recipe on taste.com.au and I cut down the sugar to about 1/2 a cup. I knew that 1 cup of caster sugar would be tooo sweet! This recipe is simple and quick and most of the family will enjoy it.....well maybe all of them!


Jam Coconut Slice Recipe
adapted from taste.com.au

Ingredients
  • 2 cups plain flour
  • *** 1/2 cup caster sugar
  • 125g butter, chilled, cubed
  • 3 eggs
  • 1 teaspoon vanilla essence
  • 3/4 cup strawberry jam (ANY JAM)
  • 2 cups desiccated coconut

Method
  1. Preheat oven to 180C. Grease and line a 3cm deep, 24cm x 29.5cm (base) lamington pan. Process flour, 1/2 cup sugar and butter to resemble breadcrumbs. 
  2. Add 1 egg and vanilla. 
  3. Process to form a dough. 
  4. Press dough into base of prepared pan. 
  5. Bake for 15 to 20 minutes, or until light golden. 
  6. Spread jam over warm base. (you will find it easier to spread when the jam is warmed in the microwave for a couple of seconds)
  7. Whisk remaining eggs and remaining 1/2 cup sugar together. 
  8. Stir in coconut. 
  9. Spread over jam. 
  10. Bake for 25 minutes, or until golden. 
  11. Cool completely in pan. 
  12. Cut into pieces. Serve

    28.1.10

    Saturday Fresh Markets at Rocklea, Brisbane


    I love going to the Fresh Markets on Saturdays at Rocklea! It is always busy busy busy with people bustling around and families lining up for very cheap fruit and vegetables (compared to supermarkets) . Not only that the markets sell the cheapest fruit and vegetables in town, they do sell breakfast for the early birds that come in to buy the freshest produce. You can already smell the delicious food when you enter! mmmm!


    Fresh Greek yogurt, food court, florist and fresh produce

    Near the flower and plant stall you can spot the Greek food stand, the Asian take away stand, the bacon and egg stand, and then the dutch pancakes and coffee stall. Across from these stalls you can spot the infamous German sausage stand which they sell the cheapest bread and sausage for about $6. They are mighty big! Trust me! In the middle of the stalls is the food court where a lot of families gather around and eat breakfast and lunch and listen to free performances by local musicians. Sometimes the kids gather around up there and dance around a bit. Cute much?

    Fresh produce

    When you enter the markets you will find the areas are mainly grouped in categories. The first part is the food, flowers and plants and then when you walk further in that is where all the fruit and vegetable stands are. Some stands are really big and some are small. Amongst them you will past wine sellers, soap stands, knife sharpie, craft shops and home made lollies. At the end of markets you will find the bargain meats and seafood! It is a bit cheaper compared to other meat sellers from the shops. I have bought only fish here and it was very fresh. The women that sell the fish are always happy and on their toes all the time. They never look tired. I am already tired just making it to the markets lol.

    Customers lining up for fresh bargain meat

    By around 11pm to 11.30pm things get a bit heated up. Most of the fruit goes CHEAP around this time. Spruikers from the stands will yell out their specials. $1 $1 $1 dollar kg for bananas!!! Then on the other stand you will hear 79cents a kg!! 79cents a kg!! for bananas!!! or 3 punnets of strawberries for 2 bux!!! That is right folks 3 punnets of strawberries for 2 bux! This is the time when I come in to get really cheap deals!! I usually make a whole loop and memorise all the prices in my head and head back to the cheapest stall to buy fruit and vegetables. I sound cheap? No, I am just being smart! I bought 7kgs of lady finger banana's for around $7 and that is sooo cheap compared to supermarkets. Supermarkets pretty much sell lady finger's for around $4.99 depending the season. Once I bought a bag of fresh tomatoes for 49 cents and 3 ice burg lettuce for only $1! The cheap price really depends on the season on the produce however the produce that are not really in season are cheaper at the markets.


    I always have a lot fun browsing around for cheap fruit and vegetables and occasionally having a quick bite of the delicious local food. I go to this market about every fortnight when I want to bulk up on fruit and vegetables. This is a big advantage if you want to buy big! However, if you are only going for a few things I suggest just save your $3 entry fee and petrol and just go to the supermarket.

    If you would like to experience what a fresh market is like then come along by yourself or bring your family! It's friendly and fun!

    When: 6am to 12pm every Saturday Morning
    Where: Brisbane Market Place, 250 Sherwood Road, Rocklea BRISBANE QLD AUSTRALIA
    How to get there: You can get there by Car - it costs $3 for parking or you can park across the road and enter the markets for $1 per person. Or you can go by public transport and stop at Rocklea station which is the closest train station (check Translink for more info)


    View Larger Map

    27.1.10

    Australian Sausage Roll


    It was Australia Day yesterday and I spent it making lamingtons cakes and sausage rolls with my little friends from Beijing China. They are only going to be here for another few more days and I am teaching and showing them what is Aussie food. Well they certainly enjoyed making and eating the sausage rolls so much! This is because they made it all by themselves. It is great just watching them making these little rolls and how well presented the rolls looked! I am so impressed that I only pretty much taught them how to make it only two times and they picked it up quickly.


    When they were processing these rolls they appeared more confident, wasn't shy trying to speak English to me and they looked so focused! The bigger boy was really focused on his rolls. You can tell which baking tray was his lol. He did also pricked holes into the pastry with the fork! lol.

    Australian Sausage Roll (With Asian Twist) makes 20 rolls


    • 400g of pork mince (might be a bit of left overs)
    • 2 cups of bread crumbs
    • 1 egg and 1 extra
    • 3 green shallots chopped
    • 1 onion diced
    • 3 cloves of garlic minced
    • salt and pepper to taste
    • 5 sheets of store bought puff pastry
    • sesame seeds

    Instructions

    1. Firstly separate puff pastry and thaw. Put in fridge so it won't go soft.

    1. Pre heat oven at about 180 degrees and line baking tray with baking paper
    2. In a big mixing bowl add the pork mince, bread crumbs, 1 egg, chopped shallots, diced onion, minced garlic and salt and pepper. Mix with clean hands and until the mixture becomes all mushy and smooth. You can do this in a processor to make it more sausage like meat if you have one.
    3. Cut each pastry square into squares (4 per sheets)
    4. Put the pork mixture into the middle of the pastry and make sure its leveled and consistent. Brush with some egg wash (from extra egg - whisk lightly in bowl) and fold pastry over and seal. Lift up and turn over onto the opposite direction and place onto the tray. And brush with egg wash on top and sprinkle with sesame seeds. Repeat until you have about 20 rolls.
    5. When you are done prick some holes into rolls with fork and bake for 30 minutes or until golden. (Mine took 40 minutes to bake - i just wanted the meat to cook thorougly for the kids)
    6. Serve with salad and dip with tomato sauce. One of my kids dipped it with soy sauce lol.

    The kids scoffed it down like there was no tomorrow. I told them you don't eat it with fork...just eat with your hands and dunk it in with sauce. And that is what they did. The bigger kid.....oh my goodness........always eating so quickly I am scared that he might of choked. HE LOVED IT. THEY BOTH LOVED IT. Too bad Aussie food is so unhealthy but I just wanted to show them this is Aussie food!


    hold your horses mate! lol

    They are going to enjoy making spaghetti bolognese tonight :)

    26.1.10

    Lamington Cakes on Australia Day

    Today is Australia Day - the day when we get an excuse to have a day off, chuck seafood on the barbie and to eat as much sausage rolls, meat pies, red meat and wash it down with foster or four x beer. Chant Aussie Aussie Aussie oi oi oi and sometimes make a fool of ourselves in front of family and friends! ... Very Bogan LOL. I don't really understand why we do that? I know I don't. It is a time to come together to reflect what is good about being Australian, what is great, how lucky we live in this land, and be proud of what we have achieved. A lot of people today will celebrate becoming an Australian Citizen. I am pretty thankful that I am Australian. I am very lucky to be here and I wouldn't want to be anywhere else.

    I am not a true blue Aussie when it comes to Australian food because it is so unhealthy lol and I sometimes don't really know what is Australian food since the country is so diverse in culture and nationalities. There are so many Chinese, Indian, English, Thai, Italian and Greek restaurants here but you hardly see an Australian restaurant. I do know there are about 2 Australian restaurants in Bali - I wonder what they serve there? A fancy meat pie? lol.

    I can name some iconic Australian foods which are: Vegemite which you spread a little bit on buttered bread (toast tastes better), meat pies, sausage rolls, Anzac biscuits, Bunderburg Rum, damper, cheezels (chips), burger rings (chips), sangas (sandwiches), chiko roll (this pastry filled roll (looks like huge springroll) - sometimes I don't know what is inside those things!) and last and not least the lamington cake which are traditional small sponge cakes covered in chocolate and then covered in coconut.


    My little friends from overseas (China) helped me make some lamington cakes the other day and they were so excited. Too bad the recipe wasn't a very good one. It was too sweet for their tiny taste buds. Well at least they know how the Aussie lamington is made. It was so cute to see how they were so focused and concentrated so hard in processing these cakes.

    I got this recipe from this site here (Aussie Slang) which came up first from a google search :P. Next time I will half the sugar! I probably make tiramisu with those lamingtons now.

    LAMINGTON CAKES

    by Aussie Slang http://www.aussieslang.com/features/australian-lamingtons-recipe.asp

    sponge cake

    Ingredients

    * 1/2 cup butter
    * 3/4 cup castor sugar
    * 1 teaspoon vanilla extract
    * 2 eggs
    * 2 cups self rising flour
    * 1/2 cup milk

    Method

    * Grease and Line a Lamington Tin (11 x 8 x 1.5 inches)
    * Cream the Butter, Castor Sugar and Vanilla until light and fluffy.
    * Add the eggs one at a time beating together as you go.
    * Fold in the Flour and Milk, alternating as you go.
    * Pour the batter into the prepared tin, spread evenly, and bake in a Moderate Oven (375f/190c) for 30-40 minutes or until an inserted toothpick comes out clean.
    * Allow to stand for a few minutes before turning out on to a cooling rack.
    * Leave to cool then store in the Fridge overnight.

    Choc Icing

    Ingredients

    * 1 slab sponge cake (one day old)
    * 4 cups icing sugar
    * 1/3 cup unsweetened cocoa powder
    * 2 tablespoons butter
    * 1/2 cup milk
    * 2 - 3 cups desiccated coconut

    To make the icing

    * Cool the cake for at least half an hour in the Fridge or Freezer, then cut into squares or fingers
    * Combine the Sugar and Cocoa in a large bowl
    * Heat the milk and butter in a saucepan until the butter is melted.
    * Add to the sugar/cocoa mixture and mix to a fluid yet not runny consistency

    To put it all together

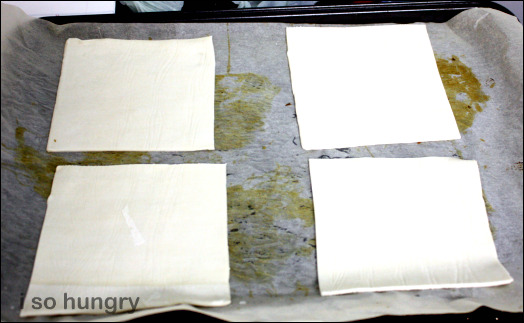
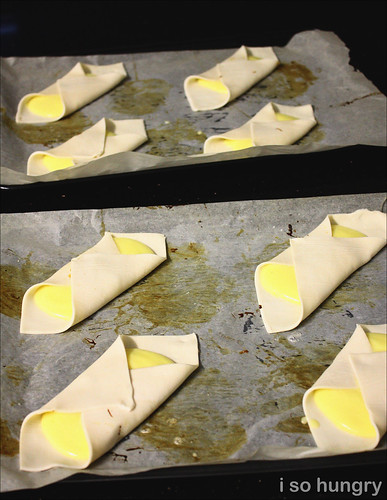
    * Make a production line of Sponge Fingers, Chocolate Icing mixture in a bowl, coconut in a shallow container or plate, and a cooling rack with paper underneath.
    * Using a fork dip the sponge fingers into the icing, roll it in the coconut covering it well, and then place on to the rack to dry.
    * Once they have dried, place in an airtight container and leave to "mature" for at least a few hours, preferably overnight, before eating.


    Processing - sponge cake dipped into chocolate icing and then sprinkled with coconut! Too easy.
    Honestly, I should of just bought already made lamingtons from the store hihi
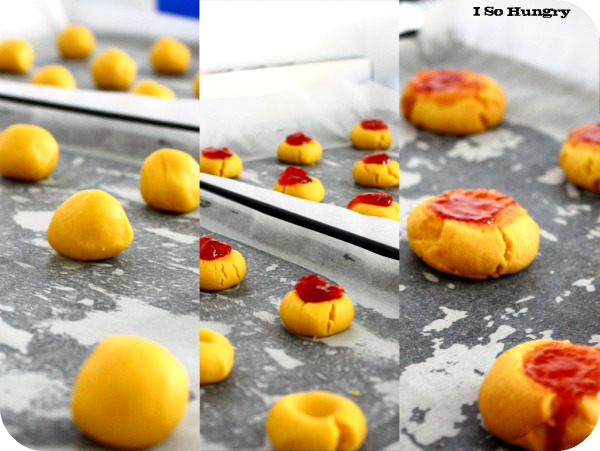
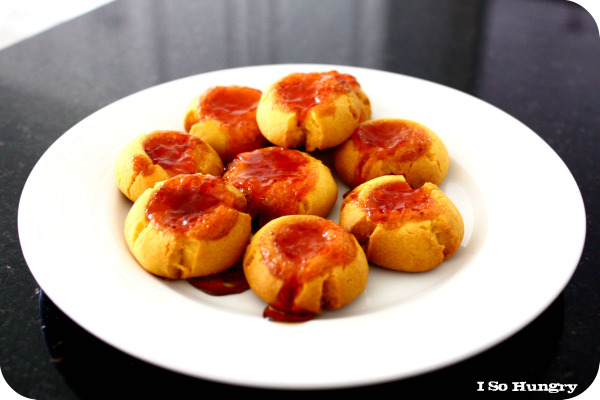
    22.1.10

    Potstickers (Chinese Dumplings)


    Hello foodie friends!

    Today I made one of my favourite foods - Potstickers which are simply Chinese Dumplings. They are either pan fried one side and steamed or steamed. These are so good when dipped into a ginger soy sauce. The potstickers are golden and crispy on the bottom and the top part is steamed. If it is overcooked it will be dry. Cooked properly, the dumplings will melt into your mouth because of the juiciness of the pork and the silky chewy texture of the wrapper.

    I used to go to Sunnybank (Brisbane, QLD Australia - a large Chinese community) all the time to eat these yummy potstickers. It was ritual to travel 35 minutes to Sunnybank Plaza just to buy 2 chinese takeaway containers of potstickers for around $10. And then washed down with a cool milk grass jelly drink from the bubble tea bar for $5. I was satisfied after that. Now I live much too far away to get potstickers :(. So I made it myself. Surprisingly it tasted nearly the same! WOOO!

    The ingredients in the recipe may look overwhelming these are so easy to prepare. I have already have everything else on hand except for the ground mince pork and the shallots! I made my own potstick dough instead of buying the white won-ton wrappers.

    There are so many variations of potstickers that you can have from vegetarian, pork, prawns and seafood. I just prefer mine with pork cause its nice a juicy and fatty!

    PORK AND CHESTNUT POTSTICKERS

    You will need: (TO MAKE 30 to 35 dumplings)


    Potsticker dough: (you can always buy white wonton wrappers at the Asian grocer instead of making these)

    - 2 cups of plain flour
    - 1 cup of BOILING water
    - extra flour for rolling

    Pork Filling:

    - 400gram of ground pork
    - 1 TBS of oyster sauce
    - 1 - 2 TBS of soy sauce
    - 1 pinch of salt
    - 1 tsp of white pepper
    - 3 green shallots chopped
    - 1 tsp sesame oil
    - 1/2 can of chest nuts (sliced in julienne)
    - 3 garlic minced
    - 1 TBS of ginger (slice in julienne)

    Other:
    - Oil for frying
    - 1/2 cup water for steaming

    Dipping Sauce

    - 4 TBS of soy sauce
    - ginger (julienne)
    - chopped chilli
    - minced garlic
    - sesame oil

    METHOD:

    Potsticker dough:

    - sift plain flour into medium sized bowl and add BOILING water. This will help the dough become elastic and smooth. Mix with wooden spoon until it becomes a dough. Now knead into soft dough on a floured surface. Roll out the dough into a 60 cm log and starting from the end cut 1.5cm pieces. Make it even so the wrappers will be the same size and consistent.

    Pork filling:

    - in a large bowl add all the sauces, salt, pepper, sesame oil, chest nuts, minced garlic, ginger, and shallots and mix until well incorporated. The mixture should be mushy. Leave for about 5 minutes to develop flavour.


    Okay now to the fun part - the wrappers. On a flour surface roll out 1 piece of dough into a 7.5 cm circle. Make sure the dough is not too thin otherwise the pork will break through. Place a spoonful of the pork mixture into the centre of the circle. Now take the ends of the circles and pinch them together to make a half moon crescent shape. Then pinch 4 pleats to make a pouch (its just for presentation and to help close the filling properly). Repeat with the pork mixture and dough pieces.

    The next part is to fry them. In a large skillet, heat up some oil (1-2 tbs) and add 15 dumplings flat side down (like in the photo below). Fry these for 2 minutes. Check to see if they become crispy and brown. At this stage add 1/2 cup of water, cover and cook for only 7 minutes or under. And repeat with remaining potsticks.


    To make a dipping sauce, in a small bowl, mix soy sauce, ginger (julienne), chopped chilli, minced garlic and sesame oil. Serve with dumplings!


    ENJOY!!! I KNOW I DID! NOM NOM NOM

    21.1.10

    My First Award :)


    This is my first award since running this little site since Oct 2009.

    Thanks A FULL TIME HOUSEFLY for this award. I love Housefly's cooking. It looks comfy and homey and that's the way I love my food! I am not a big fan of eating out at restaurants because you can only get so much on a plate. A nice full meal will do me good! Mmmm.

    With this award I have to nominate 10 bloggers and to name 10 things which make me happy.

    10 things which make me a happy woman

    1. Of course I love cooking and experimenting with new techniques
    2. Enjoying a nice long bubble spa bath (when I do get the time)
    3. Cleaning. I am very domestic lol
    4. Watching my little vegetable patch grow. This week I found 4 watermelons growing! It's half the size of a basketball already!
    5. Seeing my Mum and Dad frequently. I am so lucky to have parents like them. They are always there for me.
    6. Spending time with my partner of nearly a decade now. No I am not married yet......I am never in a rush. He loves all the desserts and snacks I make. It's so awesome when he munches everything down. I know that he appreciates it then. I think he has gone so fei lo!!!!!!
    7. Watching the collection of the Simpsons I have that my partner bought. We have 10 seasons. Watched it over and over. I never get sick of the Simpsons. Funny dysfunctional family lol.
    8. Fried Ice cream with caramel sauce on top. That makes me happy!!!
    9. The one and only friend I have since primary school hehe. She makes me laugh and makes me happy.

    I haven't been blogging that much and I haven't really made new foodie friends. I have touched based with a few foodies here personally and always coming back! So can I give this award again even if some of you guys do have it? LOL....I think I have to now.

    I would like to pass this award to these following bloggers that I touched based with for the past few months:

    1. Full time housefly
    2. 3 Hungry Tummies
    3. Rita's Basket
    4. Girl Who Ate the World
    5. Anncoo's Hobby
    6. Bo's Bowl
    7. Just Cook NYC
    8. Chic Eats
    9. Bitter Sweet Flavours
    10. Ch3rri Blossoms

    20.1.10

    Banh Tieu (Hollow Bread)


    Banh Tieu / Hollow Bread

    I was looking at this awesome foodie site by Ch3rri Blossom and oh my goodness she has a collection of really good Vietnamese desserts and sweets on there. I came across this sweet bread recipe called Banh Tieu or in English Hollow Bread. It is fried in oil producing puffs making the bread hollow and crunchy. When looking at her sweet bread photos it took me back a lot of childhood memories when I attended Vietnamese school on Saturday mornings. During our breaks there would be a little stall where students could buy Vietnamese breads, cakes and buns like Bánh bao or Tai Pao 大包 (steamed pork bun) but I remember the hollow bread because it was so nice and sweet.

    As you can see from the photo above, Ch3rri's hollow bread is 10 times as hollow and mine only produced little puffs since I was naughty - I didn't prove it for long enough and maybe I didn't roll the dough out the right way. But anyway it did turn out good and it turned out not overly sweet and was pretty crunchy! You have to be super careful not to leave the stove because they will burn! I walked away for a couple of seconds and the first two burned. Also you have to keep on moving the dough in the frying pan constantly so the dough will produce puffs. Thanks Ch3rri for that advice! It did work. (see the micro puff in the photo above? lol).

    My hollow bread below. Turned out good but not hollow like Ch3rri's *tear drop*

    Nuoc Cham (Vietnamese Dipping Sauce)

    What is the one word that pops in my head when one says Vietnam or Vietnamese? Nuoc Mam or in english fish sauce. This liquid is drained from salted, fermented fish and often used in dipping sauces and takes the place of salt. Nuoc mam is often mixed with garlic, chilli, ginger, sugar, vinegar and fresh lemons or limes to make a very satisfying dipping sauce called Nuoc Cham.

    There are a lot of online recipes for Nuoc Cham (dipping sauce) and often they are different because the varying of ingredients. This depends on their taste buds or what they have available in their kitchen. There are also different combinations and colours of fish sauce depending where it is made. Sometimes when I change fish sauce brands it can be quite dark or lighter in colour and the taste can taste a little bit different as well.

    Some people (especially westerners) will find Nuoc Mam (fish sauce) smell quite off putting and really smelly (watch out for your Vietnamese neighbours lol) but fish sauce tends to bring out and deepens the flavours of the ingredients just like salt would do. It's just like when you season your meat with salt and pepper. Vietnamese use fish sauce instead. I like to use fish sauce in my cooking pretty much everyday in meat, vegetable meals and especially in brothy clear soups. Nuoc Cham (dipping sauce) is really good with nem nuong, spring rolls, noodles and ban xeo (vietnamese pancakes) just to name a few.

    Here is my version. I use water in mine to lessen the saltiness of the sauce but my mum she doesn't use water at all. She uses lots of lime and lemon juice. It tastes really good.


    Nuoc Cham (Vietnamese Dipping Sauce) (makes one cup)

    Ingredients
    • 3 cloves of garlic
    • 1 or 2 red chillis
    • 2 tsps of sugar
    • 1/4 of lime juice or lemon juice
    • 21/2 tbs of water (or extra)
    • 2 tbs of nuoc mam (any brand)

    Mince garlic, chilli and add with sugar in a bowl. Make into paste. (If you have a mortar and pestle use it since it's easier.) Then Squeeze lime or lemon juice in the paste and mix. Add water and fish sauce and mix well. If the mix is too strong add extra water according to your taste.

    17.1.10

    Cheese Baked Rice with Pork (and the days of Lil Taipei)

    Cheese Baked Rice with Pork

    I had a Hong Kong style "Cheese Baked Rice with Pork" about 2 to 3 years ago at Little Taipei food court at Sunnybank. I think it was the Hong Kong food house was right next to exit to the bigger food court outside opposite of the bubble tea house. Now it's not there anymore. It's all shut off. I really have no idea what happened to the food court now. Maybe it breached health and safety regulations? Who knows.


    Photo courtesy of http://commericalrealestate.com.au
    Lil Taipei (top floor)
    : you have to climb 2 flight of stairs. Right hand door entrance.

    The court used to be noisy and so so busy. People eating, drinking, laughing and waiting to be seated. Waiters being off their feet the whole time serving hot orders. Cleaners working non stop. And you had so many choices of what to eat from Vietnamese, Chinese, Korean, and these little bubble tea shops. And now you only have David's Sizzling Steaks and the Korean food house in the corner surrounded empty food houses, a creepy stair case and not to mention the creepy toilets lol. Oh and now there is one cleaner waiting for you to leave so the tables be cleaned lol. Very dead. Not much competition there. I remember the Koreans packed up and left at cause no one lined up to their food house and there were so many people lining up at David's Sizzling Steaks. It was really sad.....I can imagine tumble weed floating across the food court ....:P


    Anyway back to this Cheese Baked Rice with Pork I had. I remember it being quite weird.....cheese and rice? Eww I thought. I remember the cook recommended me this dish cause he said it was "nice". Yes I listen to anyone's recommendation lol. It was pretty new to me. Cheese and rice I thought. Some Asian-Western fusion food? The waiter served me with the dish and I dunked my fork in and inside was melting cheese, lightly fried rice and pork chops! and this nice rich tangy tomato sauce. Even though it was a weird combination it was good for I think $7 with a free can of coke. Pretty good deal. The flavour just exploded in my mouth! Cheesy, tomatoey and salty. YUM!!

    I have to make it myself sometime...

    16.1.10

    Easy Jam Drops

    I made these jam drops way last year but never decided to post it because it was a fail lol. I pretty much went overboard with filling the jam in the dents I made. Or maybe I didn't dent it enough and flattened the dough balls out properly. At the end it was eaten anyway. It was pretty good. It wasn't crunchy but really soft to the bite.

    Jam drops were always my childhood favourites. I used to get Jam Tarts which were close as jam drops in Woolworths. They only carry these in the black and white brand but hey it tasted as good and the price was pretty cheap.


    Ha! I went overboard with the jam!


    I got the "Jam Drop" recipe from Best Recipes Australia. The majority of the comments sounded like it was a pretty good recipe and that's why I chose this one. I didn't have cinnamon available in the pantry so I opted it out. Still tasted good.


    Exploded!


    Someone was satisfied lol


    ----------------
    --- On a different note I have been fixing up the website again since some of my readers said that my previous layout wasn't fitting into the screen. I forget that everyone has different computer monitors. I now changed it back to the orignal fluid width so it will fit in everyone's screens. So I hope it fits.

    15.1.10

    Finally My Laminex Apron Has Arrived! :)

    Everybody loves freebies especially me! Last year I entered a kitchen make over competition by Laminex last year in October 2009 (see post it here) and by filling out the details they will give you a free black apron with their logo on it. I have pretty much forgot about the freebie and when I checked my letter box I was super happy lol. It was suppose to arrive after 28 days of submitting details but I waited for under 3 months :P.

    You know how sometimes free stuff are really bad quality? Well this black apron is super tough! It's not plastic or anything like that its like really good material. Yay now I have a new black apron!

    14.1.10

    Beef on Mustard Greens

    beef on mustard greens

    Beef on Mustard Greens is always a favourite in my home. I always tend to cook this up because it is easy, quick and healthy. Moreover, the ingredients are always available in my fridge. The recipe takes about 15 minutes to cook and usually served with jasmine rice.

    With my version of Beef on Mustard Greens I use hoi sin sauce just to give it more flavour! It's delicious because yes I made it lol and such a homey meal. The gravy that is made out the juicy beef is just mouth watering and the mustard greens leaves a nice crunch when steamed/fried for a couple of minutes. Sometimes I eat this dish with vermicelli noodles or even eggs noodles but overall I prefer it with a nice bowl of rice. If the sauce is not salty enough for me I suggest to make a small bowl of soy sauce mixed with sesame oil and if you like spice add chopped chilli! YUMMM!!

    Well if you want to try this ..........here is the recipe. Note: I don't really measure the sauces....I just go by my taste...you know trial and error :P. These are just approximate measurements.


    Beef on Mustard Greens (serves 2)

    • 500 grams of beef (ground or rump etc) sliced thinly
    • 1 bunch of mustard greens, washed thoroughly, drained and halved
    • vegetable oil
    • 1 onion sliced
    • 3 cloves of garlic sliced
    • 2 tbs of hoi sin sauce
    • 1 tbs of light soy sauce and extra
    • 3/4 cup of water
    • 1 tsp of cornstarch
    • salt and pepper to taste
    • jasmine rice, cooked (follow instructions on packet)

    Method:

    1. Firstly cook rice according to instructions
    2. In a fry pan, add garlic and fry til fragrant. Then add the mustard greens and stir fry until tender on medium high heat. Add some light soy sauce. Remove from pan and set aside on a plate.
    3. In a small bowl add cornstarch, water, light soy sauce and hoi sin sauce and mix well until cornstarch dissolves. Set aside.
    4. In the same pan, add onion and garlic and stir fry til onion is half way cooked. Then add the beef strips. Stir fry til its browned. Remove beef and lay this on top of the mustard greens. The pan should have some of the broth/juice left over from cooking the beef.
    5. With the cornstarch mixture, add that into the same pan and cook until the sauce thickens. Add in the beef and stir around until coated. Take out and lay on greens again. And top with the gravy generously.
    6. Serve with rice!


    beef on mustard greens


    Okay off to make chicken wings tonight! :). Have a good day.

    12.1.10

    Beef Spaghetti with Black Pepper Sauce

    Beef Spaghetti with Black Pepper Sauce

    I made this "Beef Spaghetti with Black Pepper Sauce" tonight alternative to the traditional bolognese recipe. It was pretty good! I remember having black pepper sauce with spaghetti at budget David's Sizzling Steak (at Market Square Sunnybank Brisbane) as a side dish to their steaks and other mains. It tasted really peppery and it really suited with their egg that was still runny in the middle. Mmm mmm! I haven't gone back to Sunnybank for ages because Lil Taipei food court has pretty much closed down (apart from David Sizzling Steak is still there and a bubbel tea shop I think). It used to be very busy now all I can see is tumble weed passing throughout the now creepy place lol. That's another story!

    Beef Spaghetti with Black Pepper Sauce

    To serve 2 people for this dish all you need is:

    • 250gram of thick spaghetti (half a pack)
    • 1 onion sliced
    • 2 cloves garlic sliced
    • 1 carrot chopped into thick slices
    • 2 tbs of oyster sauce
    • 2 tbs of light soy sauce
    • 1- 2 tsp of black pepper and extra
    • salt
    • 1 cup water
    • 1 tsp of corn flour

    Method:
    1. First off bring water to boil in a pot and cook spaghetti according to instructions. Then drain and set aside.
    2. In a bowl combine oyster sauce, soy sauce, pepper, and salt. In another bowl add water and cornflour together until the cornflour had dissolved. Add this mixture into the sauce mixture and combine.
    3. In a saucepan fry onion and garlic til cooked. Add the carrots and cook
    4. Add beef strips into the same pan and cook til its brown. Do not over cook it. Add pepper and salt. Add in the sauce mixture and coat the beef.
    5. Simmer for 3 minutes
    6. Add the spaghetti into the mixture and coat spaghetti well.
    7. Then with tongs lay spaghetti onto a plate and top with beef strip

    11.1.10

    Chicken and Vegetable Soup (asian styles)


    Yesterday I had a long day cleaning up the house and gardening and the last thing I wanted to do was cook up a nice meal at 5.30pm. I walk over to the fridge, open it and look up down, middle, left and right and I see nothing but dips, creams, salad dressings, lemons, potatoes and carrots. What do I cook with potatoes and carrots???? I couldn't just simply eat it alone. I am not a vegetarian and surely vegetarian food tastes nice but I am so bad at flavouring vegetables sometimes. I really need meat. Oh yeah ....I see some fresh chicken wings mum has given me (she buys heapss!!). So what do I make with these three awesome ingredients? CHICKEN & VEGETABLE soup of course but my style......asian styles lol *cause of the fish sauce :D*. I have no celery....but that's okay ...I am not making some traditional soup.

    The recipe is pretty simple.....it's just one pot! Ready in under an hour! It's pretty healthy. No fat at all. I put the soup in the fridge last night and when I checked it in the morning there was no fat layer left behind.

    For a medium sized pot of chicken and vegetable soup you will need:

    - 10 chicken wings
    - 4L water
    - 5 cloves of garlic
    - 2 carrots chopped in chunks
    - 2 potatoes chopped in chucks (quarters)
    - 1 to 2 cups of pasta
    - pepper and salt to taste
    - glug of fish sauce
    - fresh herbs to garnish

    • Firstly in a large pot add 3 to 4L of water. Add cloves of peeled garlic (don't chop). Boil on high.
    • While the water is boiling, wash your chicken wings, chop up carrots and pototoes
    • When the water is boiled add the chicken wings. Boil until the chicken is nice and tender and cooked. To check just scoop one out and cut through. If you see the skin is still pinky red and bloody..it's not ready yet. Don't over cook it otherwise it will taste dry.
    • When your chicken is done, remove it immediately from the pot and run it under cold water in a large bowl. This will help it to stop cooking. Cut or tear into strips. Set aside.
    • While the pot is still boiling add vegetables for 15 to 20 minutes.
    • When the vegetables are halfway cooked add in your pasta.
    • Add salt and pepper and a glug of fish sauce. It helps to bring the flavour out. Taste accordingly.
    • Ladle pasta and broth over bowls and garnish with herbs. Add soy sauce if you want the soup to be more salty.
    *** you don't need to eat this with pasta. Jasmine rice will do .....even tastes better!

    I enjoyed it. It might be bland but that is all I had in the fridge :).


    Have a good day

    8.1.10

    Vanilla Pandan Mango Swiss Cake / Swiss Roll

    Pandan cake (or anything to do with pandan) has always been my favourite at the Asian Markets. This cake is light, fluffy and flavoured with pandan juice. The light green colour is from the chlorophyll in the leaf juice. The cake is originally from Malaysia but you can find it anywhere in your local Asian markets nowadays. A slice of cake would usually cost around $2 and would be nice warm and fresh delivered on Saturday mornings. I have always wanted to try to bake pandan cake and today was the day :).

    I used a basic sponge cake recipe from CHOW TIMES and followed their techniques in baking a swiss roll. I made 2 roll cake bases to make a layered swiss roll instead the actual cake. I just left one base as vanilla and added pandan flavour to the second base. I then added whipped cream, mango and toasted almonds in between. I had a hard time rolling it up because it was so fat. The bases didn't turn out thick because I used a bigger tray :(. I really should invest in smaller trays. At the end it tasted really good! Nice and fluffy, moist and not too sweet which is the way I like it!


    This is my first attempt. I so didn't want to post it up cause it was a "fail" lol but hey when I rolled it there were no cracks! So I must be doing something right here.

    So how many of you made pandan cakes???? Did it turn out right the first time??? I am sure all of you have since it's a pretty popular google search keyword :).

    Have a good Friday! I am off out to dinner :D

    6.1.10

    Easy Custard Danishes (with Mango)

    Hello to my foodie friends! Thanks to all that have followed me!

    I have been doing a lot of changes to this website. Took me a couple of hours to play around with and hopefully it looks and feels a lot better. The last layout I had I felt that it was too cluttered and really messy. This one looks a bit neater and easier to navigate around.

    I have been going mad with the convenience of puff pastry lately. I have been eating puff pastry with either just the custard or filling it with some sort of fruit like my previous puff pastry with apple post. This time I have made it with custard and mango. I made it as danishes :). Mmmmmm.

    Check out this one I made last week!


    Looks easy hey? Once again I tried to mimic my former boss's danish but didn't look right. Tastes quite as near lol.

    To make 8 custard danishes (with mango) you will need:

    • 2 sheets of store bought puff pastry rolled out
    • butter (melted) to brush on top of pastry
    • 1 ripe mango

    for custard filling:
    • ½ cup sugar
    • ½ cup water
    • 2 tbsp cornflour
    • 1 cup milk
    • 2 egg yolks
    • 1 tsp vanilla extract

    Method:

    Firstly preheat oven to about 200C. Roll out 2 pastry sheets and cut into 4 squares each and lay onto 2 trays like the one below. Put into fridge.


    I re-use the baking sheets! After a few uses I chuck it away. This is the best baking paper I have used!! It's non stick :)


    To make the custard:

    Put the sugar and water into a saucepan and stir until the sugar is dissolved. Bring to the boil and simmer for 2 minutes or until the mixture is slightly syrupy.
    Mix the cornflour to a smooth paste with a little of the milk. Add the egg yolks and whisk until combined. Add remaining milk, vanilla and the sugar syrup. Return to the pan and stir over a low heat until the mixture thickens. Cool.
    Take out prepared pastry sheets out of the fridge and carefully spoon cooled custard onto each of the pastry squares. Start spooning it from the middle of the square because the custard will flow outwards because of the consistency. And then fold from one corner of the pastry to the middle. Do the same for the opposite corner (like shown below). Brush top of pastry with melted butter.


    Pop the trays into the preheated oven and bake for about 20 minutes until golden brown and puffy.

    When it's done cool it for about 10 minutes.

    Then with the mango cut some chunks and carefully make a slit into each end of the danishes and insert the mango pieces. It should look like the photo below.


    Done!! Enjoy cause it will not last long :)

    Question:


    What do you eat with puff pastry???? Mine is custard! And sometimes wrapped around sausage! What is yours???

    5.1.10

    Easy Apple Pie with Vanilla Ice Cream

    This is the most easiest and fastest way to whip up an apple pie with ice cream! All you need is a jaffle maker (sandwich maker), puff pastry, tinned apples, cinnamon and vanilla ice cream! The lemony taste of the apples compliments with vanilla ice cream. It takes most of the sourness of the apple away. Pretty good.


    Easy Apple Pie with Vanilla Ice Cream

    Ingredients to make 4 portions


    - under half a can of tinned apples
    - pinch of cinnamon
    - 1 sheet of puff pastry rolled out
    - melted butter

    - optional: 1 tbs raisins

    appliance - a sandwich maker (should of 2 portions)

    Method

    • First roll your thawed (not too thawed cause it can get wet and hard to work with) puff pastry out and cut into 4 squares.
    • Meanwhile add under half a can of apple into a small bowl along with a pinch of cinnamon. Mix.
    • If you want to add raisins I suggest soak it into lukewarm water so it will be plump and juicy. Drain and squeeze out excess water .
    • Brush the bottom of the jaffle maker with melted butter and lay 2 cut outs of the pasty on top
    • Lay equal portions of apple on top of the first layer of pastry and sprinkle with raisins
    • Then lay the 2 last pastry on top and brush with melted butter generously.
    • Close up the jaffle maker and cook until pastry is crunchy and golden brown
    • Then when it's done cut into small portions and add 2 scoops of vanilla ice cream for each serving.
    Too easy!

    4.1.10

    2kg Roast Pork With Crackle


    This is the second time I have ever roasted pork. The first time was okay but I burnt it lol.

    This time round it came out pretty good! I used meat with heaps of fat on top to keep the meat moist and delicious. Also I wanted to make a bit of crackling too (which didn't come out right but I crackled it anyway in the microwave). The roast came out moist, tender and very juicy. So thank goodness I didn't over cook it cause I hate dry meat. Yuck! I didn't over season with it with fancy herbs - just salt and olive oil. The end I just made up a gravy from the juices from the pork and roast vegies. Very rich and yummy :).


    Roast Pork with Crackle

    Ingredients:

    • 2 kg leg of pork with fat skin on
    • some salt
    • some olive oil
    • 4 potatoes cut in quarters,
    • 1 sweet potatoes cut in quarters,
    • one onion cut in quarters
    • garlic skin on
    • some water and corn flour (for the gravy at the end)


    Method

    First preheat your oven at about 220°C

    Place the pork skin side up on a big cutting board or clean kitchen surface. With a sharp knife score the skin about half an inch apart but don't score into the meat. Then with boiling pour over the scores to whiten the fat. Pat dry, rub and massage with oil over the pork and then rub with salt. Brush any excess salt off. Then with the other side with pinches of salt.

    Now place the pork fat side up into a roasting pan and put into preheated oven. Roast for about 30 minutes or until you see the fat beginning to crackle. Turn the temperature down to 170°C and roast for another 1 to 2 hours. Then at this point base the pork with the fatty juices from the tray and add the vegetables and cover with fatty juices as well. Roast until vegetables become nice and tender. This will take at least another 40 minutes.

    To check if the pork is done, put a sharp knife through the centre of meat. If clear juices run out - it means it's done. If it comes out clear-red it is still not cooked through yet.

    When the roast pork is done remove from the roasting pan along with vegetables. Stand for 15 to 20 minutes. This will keep the juices in.

    To make the gravy deglaze the pan with water and bring to simmer. If you want a thicker consistency add some corn flour in the first instance and whisk until a nice custard like consistency. Add some butter for richer flavour.

    It takes hours to make but worth at the end!


    Tip: If your crackle failed like mine (above) carve some off and place it on a microwavable plate and cover with a paper towel. Put on High for about 2 minutes. Crackle is done!